
Why create curtains
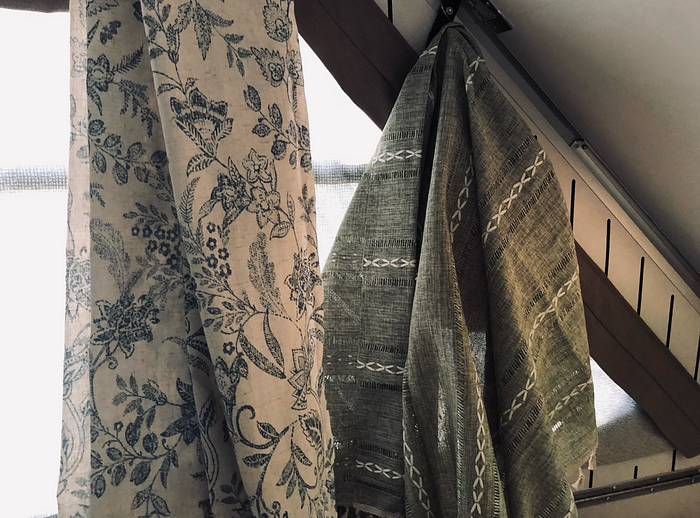
The camper was only a year old, but I wanted curtains that felt cottage-y and less generic (my partner jokes that the Aliner beige interior is designed by a middle-aged man). Here are original curtains:

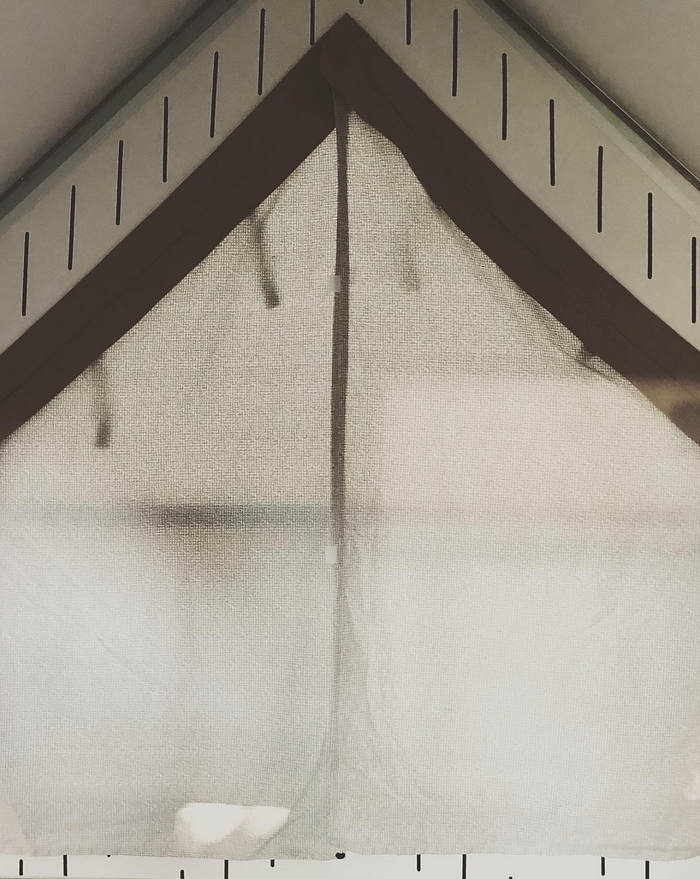
Here are the new curtains:

Process
Having never sewn before, here is what I did:
Research
First I searched for ‘curtains’ in Aliner camper facebook groups, to see the customizations other people have done. I realized that I wanted to keep the top paneling, to keep the framing of windows.
Decide on method
Some methods people have used:
- Use the original curtains as a template, to create new curtains.
- Sew curtains on top of the existing ones, creating a thick double-layered blackout curtains in the process. Keeps existing velcro in place.
I was planning on going with method 1, so that I could easily replace curtains when I wanted a different style. However, it was clear after day 5 of sewing after work that I would not be doing this often, so I decided to go with option 2, which saved time.
Decide on fabric
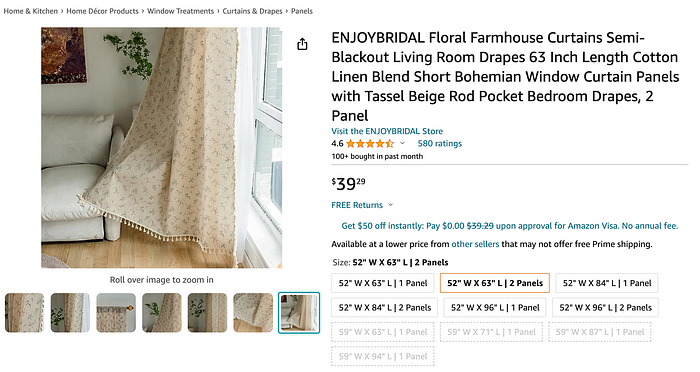
I ordered 5 different kinds of curtains on Amazon, and chose the one that I loved immediately on first sight. It was important to actually see the curtains inside the camper — there were definitely some that I thought would work great, but ended up being too musty-feeling or didn’t match our existing privacy curtain. I also considered some blackout curtains, but ultimately didn’t like the fabrics of the options I received.
Dimension of 2022 Aliner Ranger (each aliner is different so I would measure yours separately):
- Main Curtain: 51 in tall, 50 side
- Side curtain: 35 in tall, 56 wide
Getting one set of 56 wide by 63 tall curtains (which came with 2 panels) proved to be more than enough to cover the Aliner curtains.
Materials
- Hemming tape (I ended up using the thinnest available hemming tape the most. Otherwise the hems got big and chunky)
- Standard Thread
- Original aliner curtains
- Fabric velcro
- New curtains
I considered buying a cheap sewing machine on Amazon or a handheld sewing stapler since I don’t have much space in my house. But a coworker who regularly sews her own clothes told me if I’d be better off buying a real stapler than a sewing stapler :D, and that I am better off buying a used sewing machine on Facebook. As long as the machine ran on electricity, was listed as ‘running’, and could do zigzag stitches, the machines were solid and instructions were easy to find online.
I decided to go with just hemming tape because I was already getting tired. Using hemming tape essentially means ironing fabric on top of each other, which felt a lot more approachable to me than hand sewing or purchasing sewing equipment.
Make!
I thought about documenting each step with photos but even just making the curtains was a lot.
- First, I pulled off the curtains, which was easy since they are attached to walls with velcro.
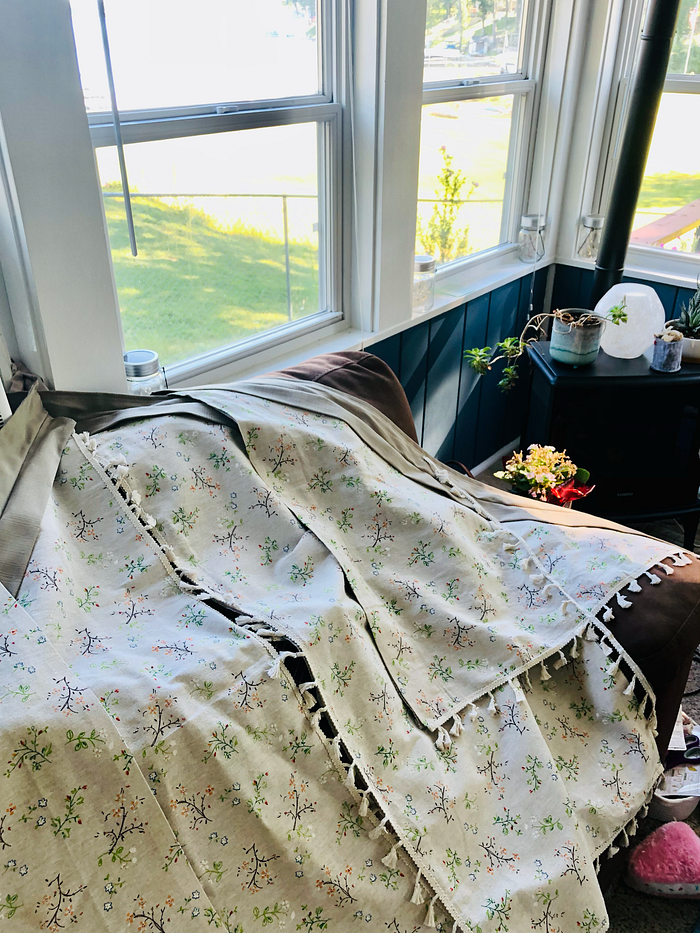
2. I laid the curtains on top of the new fabric, and cut out the shapes.
3. I doublehemmed the fabric with hemming tape, after watching a 3–4 min video on youtube. I could have just done this directly onto the curtain, but I ended up doublehemming the fabric first, and then used hemming tape again to weld the new curtains onto the original.
4. Some edges had tassles and others did not, so I ended up handsewing some of the leftover tassles onto plain edges.
5. I stuck on fabric velcro to the original places that have velcro (ex. the curtain handles, not sure what it’s called. The fabric that lets you pull curtain back)
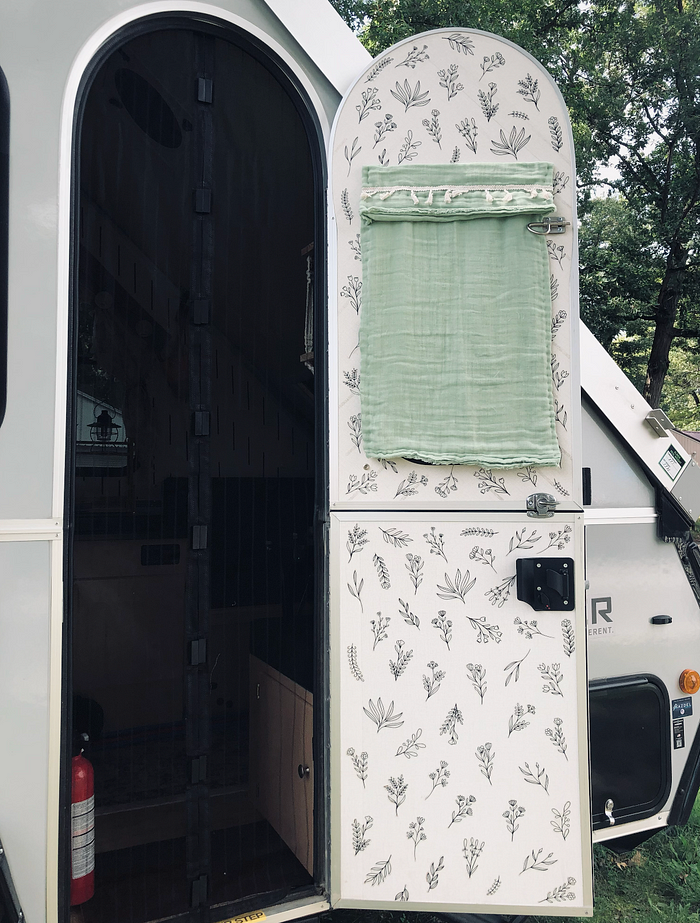
5. The curtain for the door window ended up being too busy with our door decals, so I did end up buying some additional green fabric at Jo-anns and hand-sewing the door window. It is a huge and lumpy as a hot dog when rolled up though.
Results
Reminder of before:
After:


Reflections
- Glad I did it. The Aliner is much cozier.
- I’m probably not going to do it again. It took me 5 days after work, so likely 20+ hours total. I liked ‘sewing’ (ironing on hemming tape mostly) but I found it exhausting to pay such precise attention to detail after my day job as a digital product designer, where I spend most of my day paying attention to tiny pixels.
- Sewing was fun but I saw how much time and skill it took, and I grew more appreciative of all the other things in my life I take for granted, that depend on the handicraft of others.
- I felt more capable. My coworker said that knowing how to sew is like knowing how to operate a power drill, and that it is empowering. Now, when I have a rip or a broken clasp, instead of thinking the item of clothing is unusable, my first thought is “I can probably fix that…I wonder how.” That’s a very different mindset than the one I’m used to.
- The Aliner being so custom and not built in 90 degree angles forces us be creative with customizations. I became more appreciative of how much time and energy my partner dedicates to Aliner electricity and solar customizations (and how much he enjoys it).

